Sunday, December 10, 2017

31 inch Jakks Pacific Star Wars 3P0 Custom


Began the process by taking the figure apart and taping the parts that would not be painted gold.


Also began by prime nag the entire body and head.


I then proceeded to cut out the eyes. Once this was accomplished, I used a miniature village fence section for the vertical lines in the eyes. Attached to the fence was a piece of netting fabric. This was painted with gold paint and LEDs were installed behind the eyes with a battery pack (three AA batteries). 


Next a notebook divider was cut for the eyepieces (orange in color). Then a round piece of black maskin tape was added to each eye. The entire body was painted gold and the black section was painted with Model Masters flat black.
The arm was originally red but I wanted to make him into “A New Hope” 3P0 so I painted the arm gold and his leg silver metallic.


Here he stands next to R2.

1/4 Scale Jakks Pacific Cyborg Custom


Sunday, November 19, 2017

1/4 Scale Jakks Pacific Captain Phasma (Star Wars)


(on the left) Figure before customization
(below) Figure after customization


Customized that 1/4 scale Jakks Pacific Captain Phasma by painting the entire figure a metallic silver. This required disassembling the entire figure to get to the hard to reach places. Also repositioned the right arm so that she is holding the blaster up.

Continued the customization by repainting all the areas with black Model Master's Paint from Testors. Purchased a good material and used the old cape as a pattern to fashion a new cape. Used bright red paint (multiple coats) to paint the red stripe on the cape. Also sewed the areas of the cape that needed to be sewn to get the shape and fit of the original. Once that was complete, the gun was also painted and detailed (using the metallic silver, flat black, and bright red). Lastly, a gloss coat was added using Rustoleums Clear Gloss.

To compliment, the 1/4 scale Jakks Pacific Stormtrooper was also painted with a clear gloss as this more resembles the appearance in the movie. Otherwise, nothing else was done to the stormtrooper.


Ready for battle--together :)


Tuesday, November 14, 2017

1/4scale Justice League The Flash Custom

Before Customization - out of the box

After Customization


.
This is the back of the original figure. The detail is there but everything looks like plastic and is the same texture and color.


Began the custom by cutting the legs off at the knees and re-positioning them in a running stance. Next, one of the arms was cut and re-positioned at a 90 degree angle for posing later in a running stance. Next, went over the entire figure (minus the face) with black shoe polish. Letting it dry and going over it with a light scouring pad/sponge.  After this, a gloss machine red model masters paint was used to paint the shiny pieces of The Flash’s armor to match his costume in the upcoming film. 

Next, his legs were cut at the knees and trimmed in order to put them back on in a running position. Then they were glued and epoxy clay was used to fill in the gaps. Once the clay hardened, it was grinded down to make it fit the contours of the rest of his legs. Flat Black Model Masters paint was then used to paint the areas where the work occurred.

Then the process of painting all the electric wiring was painted on the suit using Model Masters Silver. 


I


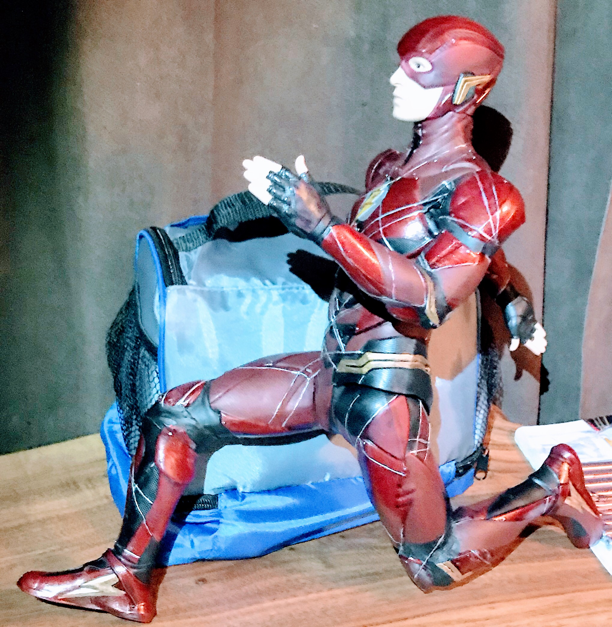
Almost complete except for closing one hand into a fist, completing a diorama stand, and doing some touch-up on the face. Also will add some "lightning" to figure by using hot glue painted with a transparent light blue color. The diorama stand will be a road with cracks from the running Flash complete with stripping.
With Stand completed - gloss black rim

Near Completion with stand
Frontal View
Side View
Behind
Diorama stand with cracks in cement and foot sinking into pavement.